How to use the PHPMyAdmin One-Click Application Image
- 3526 days ago
- PHP
- 2025 Views
Introduction
While it is possible to manage a MySQL database server completely from the command line, many users prefer to use a GUI interface and PHPMyAdmin is the most popular web-based MySQL management tool available.
PHPMyAdmin provides an easy to use interface to manage databases, users and tables for your MySQL instance and the PHPMyAdmin One-Click Application image allows you to save time by starting with a LAMP configuration and PHPMyAdmin already in place.
Create your Droplet
To get started with the PHPMyAdmin Application Image create a new droplet from the control panel specifying a hostname and plan.

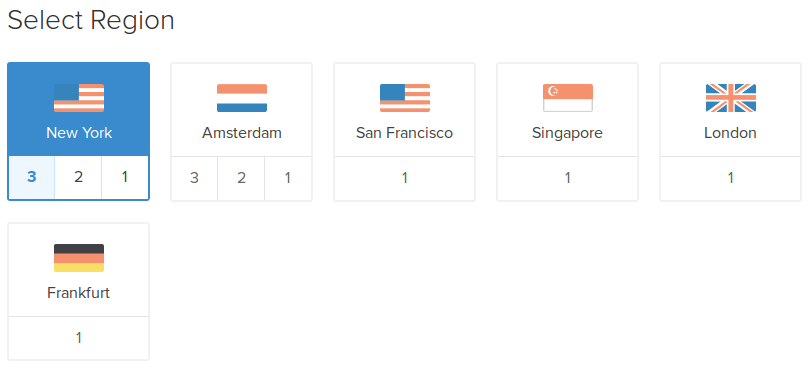
Select the region where you want to create your new droplet...

and select PHPMyAdmin on 14.04 under the Applications tab.

If you use ssh keys to log into your droplets you can specify a key here.

Now click create to start your droplet creation.
Log into PHPMyAdmin
Your new PHPMyAdmin droplet is ready to use as soon as it is launched but you will need to log in once via SSH or by using the web console in order to access your MySQL root password.
When you log in you will see a message like the one below:
-------------------------------------------------------------------------------------
Thank you for using DigitalOcean's LAMP/PHPMyAdmin Application.
Your PHPMyAdmin installation can be accessed at http://0.0.0.0/phpmyadmin
The details of your PHP installation can be seen at http://0.0.0.0/info.php
Your MySQL root user's password is gNv8yafpVZ
You are encouraged to run mysql_secure_installation to ready your server for production.
-------------------------------------------------------------------------------------
To delete this message of the day: rm -rf /etc/motd.tail
Make a note of your MySQL root password and then open a web browser and browse to http://DROPLET_IP/phpmyadmin. Log in with the username root and your MySQL root password. You should then see a page like the one below:

Creating a Database
To create a new database you can click on the "Databases" tab where you will see a form that will allow you to specify the name of your new database.

Creating a User
It is not always advisable to use your root user for your web apps. For this reason you may want to create a new user on your MySQL server. If you click on the Users tab you will see the option to Add a user.

This link will take you to a form where you can add a user and select their privileges.
Secure PHPMyAdmin
We were able to get our phpMyAdmin interface up and running fairly easily. However, we are not done yet. Because of its ubiquity, phpMyAdmin is a popular target for attackers. We need to secure the application to help prevent unauthorized use.
One of the easiest way of doing this is to place a gateway in front of the entire application. We can do this using Apache's built-in .htaccess authentication and authorization functionalities.
Configure Apache to Allow .htaccess Overrides
First, we need to enable the use of .htaccess file overrides by editing our Apache configuration file.
We will edit the linked file that has been placed in our Apache configuration directory:
sudo nano /etc/apache2/conf-available/phpmyadmin.conf
We need to add an AllowOverride All directive within the section of the configuration file, like this:
    Options FollowSymLinks
    DirectoryIndex index.php
    AllowOverride All
    . . .
When you have added this line, save and close the file.
To implement the changes you made, restart Apache:
sudo service apache2 restart
Create an .htaccess File
Now that we have enabled .htaccess use for our application, we need to create one to actually implement some security.
In order for this to be successful, the file must be created within the application directory. We can create the necessary file and open it in our text editor with root privileges by typing:
sudo nano /usr/share/phpmyadmin/.htaccess
Within this file, we need to enter the following information:
AuthType Basic
AuthName "Restricted Files"
AuthUserFile /etc/phpmyadmin/.htpasswd
Require valid-user
Let's go over what each of these lines mean:
- AuthType Basic: This line specifies the authentication type that we are implementing. This type will implement password authentication using a password file.
- AuthName: This sets the message for the authentication dialog box. You should keep this generic so that unauthorized users won't gain any information about what is being protected.
- AuthUserFile: This sets the location of the password file that will be used for authentication. This should be outside of the directories that are being served. We will create this file shortly.
- Require valid-user: This specifies that only authenticated users should be given access to this resource. This is what actually stops unauthorized users from entering.
When you are finished, save and close the file.
Create the .htpasswd file for Authentication
Now that we have specified a location for our password file through the use of the AuthUserFiledirective within our .htaccess file, we need to create this file.
We actually need an additional package to complete this process. We can install it from our default repositories:
sudo apt-get install apache2-utils
Afterward, we will have the htpasswd utility available.
The location that we selected for the password file was "/etc/phpmyadmin/.htpasswd". Let's create this file and pass it an initial user by typing:
sudo htpasswd -c /etc/phpmyadmin/.htpasswd username
You will be prompted to select and confirm a password for the user you are creating. Afterwards, the file is created with the hashed password that you entered.
If you want to enter an additional user, you need to do so without the -c flag, like this:
sudo htpasswd /etc/phpmyadmin/.htpasswd additionaluser
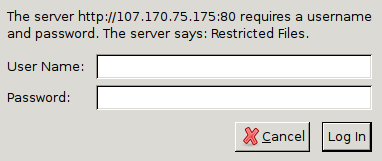
Now, when you access your phpMyAdmin subdirectory, you will be prompted for the additional account name and password that you just configured:
http://domain_name_or_IP/phpmyadmin

After entering the Apache authentication, you'll be taken to the regular phpMyAdmin authentication page to enter your other credentials. This will add an additional layer of security since phpMyAdmin has suffered from vulnerabilities in the past.
Conclusion
You should now have a configured and secured PHPMyAdmin instance and MySQL database ready to use. Since your droplet includes a full LAMP stack you can deploy web content to your droplet easily by placing files in your /var/www/html directory. More information on using PHPMyAdmin can be found in the official documenation from the PHPMyAdmin Project.


